Scanning with the Panasonic Scanner
Scanning Client Documents to Server with Desktop Scanner
Document Preparation
1. Make sure the scanner glass is clean. Use a microfibre cloth to scan both scan heads.
2. Ensure that you have all pages of all documents are in the correct page sequence.
3. Ensure that your pages will not jam in the scanner:
- smooth all pages
- remove all staples
- remove all paper clips
Scanner - SelectPick Where to Scan
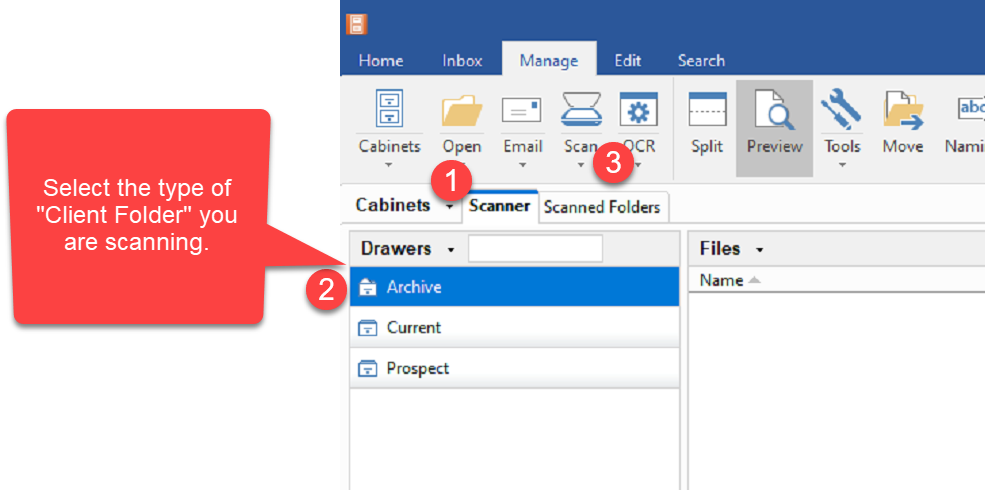
1. Go to [Manage] tab >> Select [Scanner]
2. Select the Type of Client Folder you are Scanning.
- Archive
- Current
- Prospect
3. Select the [Scan] button on the ribbon bar >> [New Scan]
Name your Scan File
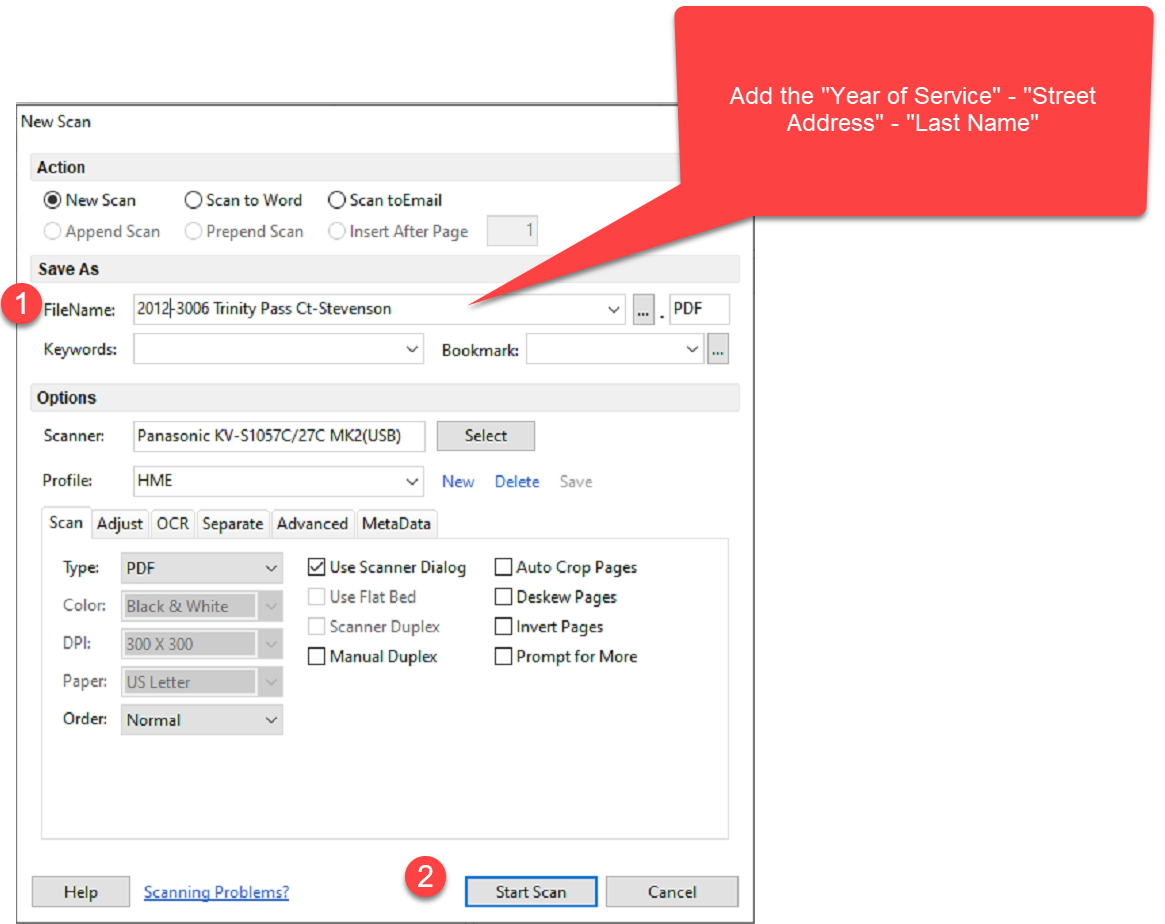
4. Give the new file a name [FileName]. Be sure to follow the Naming Options as configured on FileCenter - Add “Year of Service”- “Street Address” –“Last Name”
5. Ensure that [HME] is the Profile used for scanning
6. Select [Start Scan]
Select Your Panasonic Scan Profile
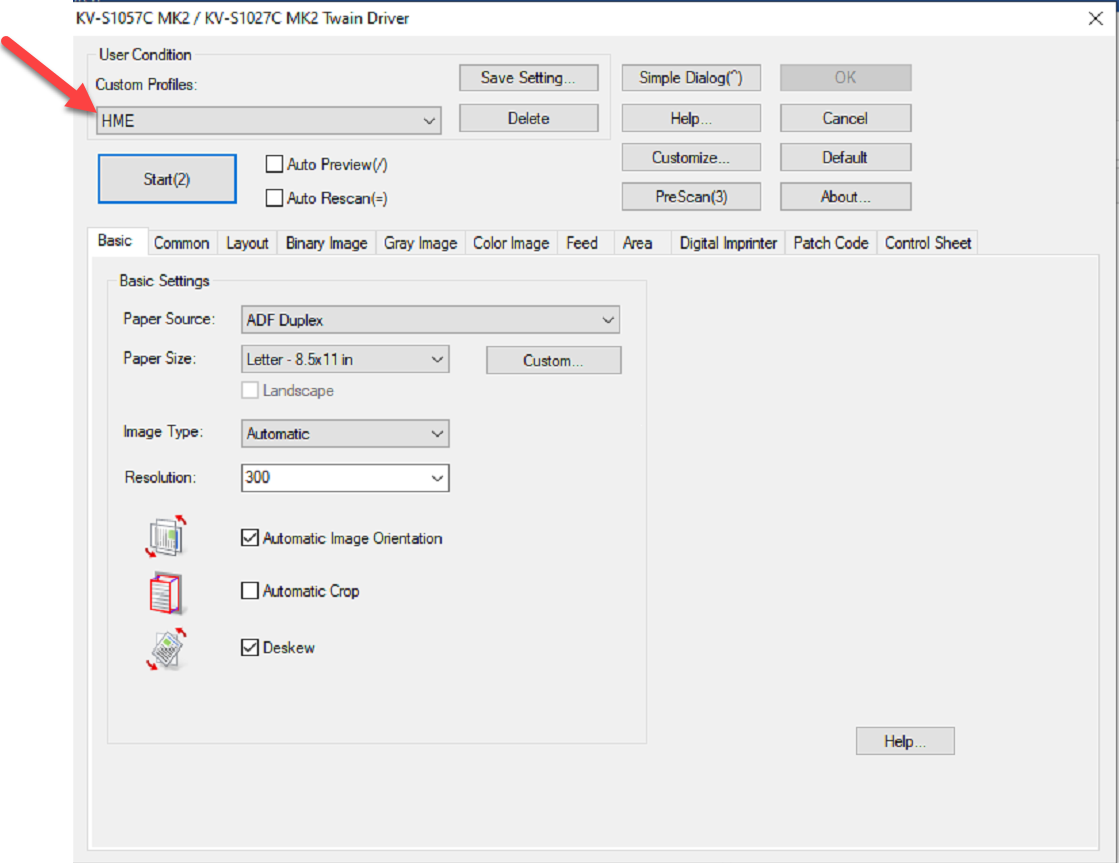
7. The Panasonic scanner will launch a user interface - select the correct scanning profile
Document Processing
Files are processed by the QuikBox. It may take 3 to 10 minutes for it to show up on the server depending on the scanned document’s page length and content. The server has been set up to index the scanned PDFs content, thus, making document searches fast and easy from any networked Windows computer. Now Users can find documents by searching by any document content. Content search has been configured on the server for PDFs, Word, Excel, & PowerPoint documents.
Troubleshooting
1. If lines are on the scanned images, clean the scan heads. This should be done regularly. Use a microfibre cloth to scan both scan heads.