**Important:** If you have a Microsoft Microsoft 365 account, and you use Outlook and Outlook on the web or Outlook on the web for business, you need to create a signature in both products. To create and use email signatures in Outlook on the web, see [Create and add an email signature in Outlook.com](https://support.microsoft.com/en-us/office/create-and-add-an-email-signature-in-outlook-com-776d9006-abdf-444e-b5b7-a61821dff034) or [Outlook on the web](https://support.microsoft.com/en-us/office/create-and-add-an-email-signature-in-outlook-on-the-web-5ff9dcfd-d3f1-447b-b2e9-39f91b074ea3).
1\. Open a new email message. 2\. Select **Signature > Signatures** from the **Message** menu. Depending on the size of your Outlook window and whether you're composing a new email message or a reply or forward, the Message menu and the Signature button might be in two different locations.  3. Under **Select signature to edit**, choose **New**, and in the **New Signature** dialog box, type a *name* for the signature. 4.Under **Edit signature**, compose your signature. You can change fonts, font colors, and sizes, as well as text alignment. If you want to create a more robust signature with bullets, tables, or borders, use Word to format your text, then copy and paste the signature into the **Edit signature.** 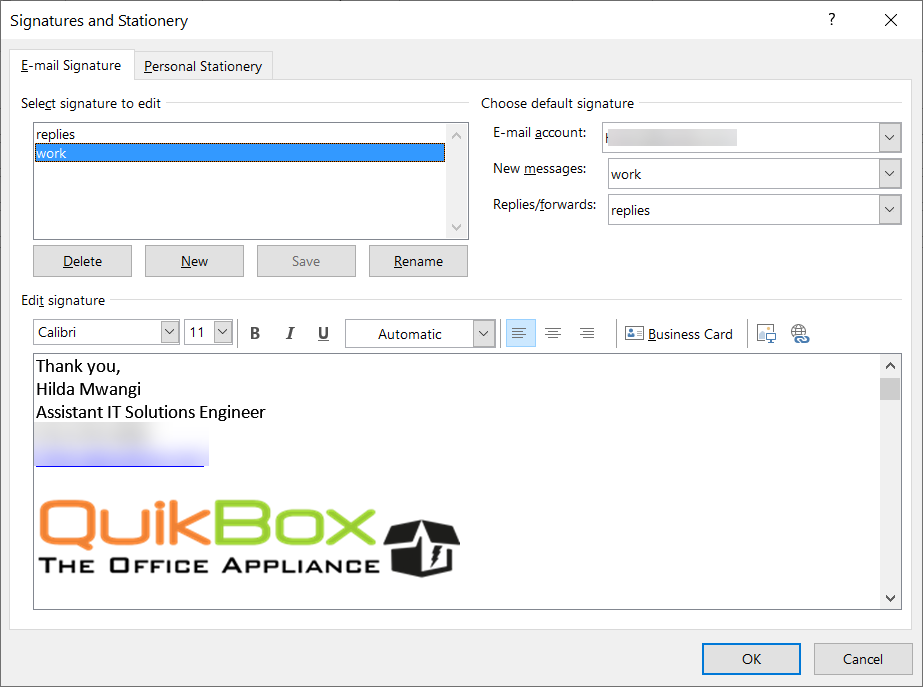 5.Under **Choose default signature**, set the following options for your signature: In the **E-mail account** drop-down box, choose an email account to associate with the signature. You can have different signatures for each email account. 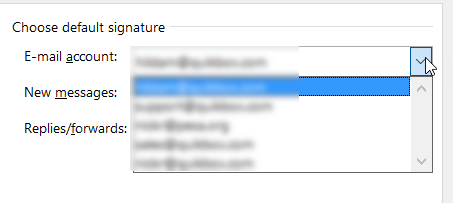 If you want your signature added to all new messages by default, in the **New messages** drop-down box, select one of your signatures. If you don't want to automatically add a signature to new messages, choose (none). This doesn't add a signature to any messages you reply to or forward. If you want your signature to appear in the messages you reply to and forward, in the Replies/forwards drop-down, select one of your signatures. Otherwise, accept the default option of (none). # Share your Outlook Calendar 1. Select the Calendar button in the Navigation Bar [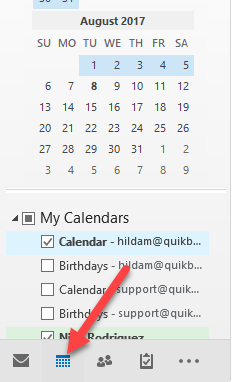](https://books.quikbox.com/uploads/images/gallery/2021-12/hqFe8gT1onNlYpiD-outlook1.png) 2. Select the calendar that you would like to share, right-click on your Calendar and then Calendar Permissions.[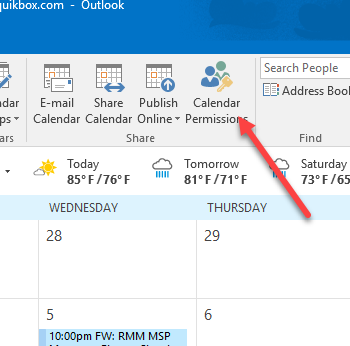](https://books.quikbox.com/uploads/images/gallery/2021-12/CqMbMbDE9YgvHIbb-outlook2.png) 3. On the 'Permissions' tab, you may add or remove users whom you have delegated access to your calendar.[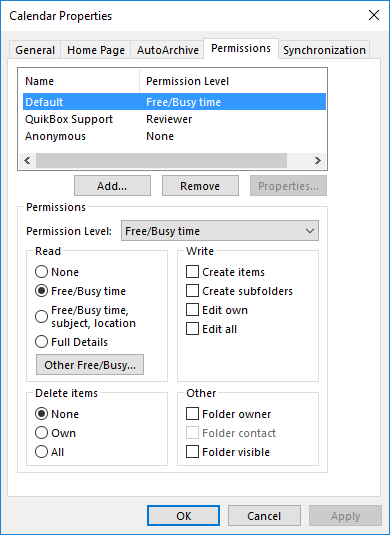](https://books.quikbox.com/uploads/images/gallery/2021-12/nymnUuC1Y067hT8R-outlook3.png) 4. To add a new delegate, select Add... and search for the desired user by Last Name. You can search the Global Address List, or your personal contacts list by selecting the appropriate drop down under Address Book. Under the Permissions heading choose the level of detail you would like to provide the user.[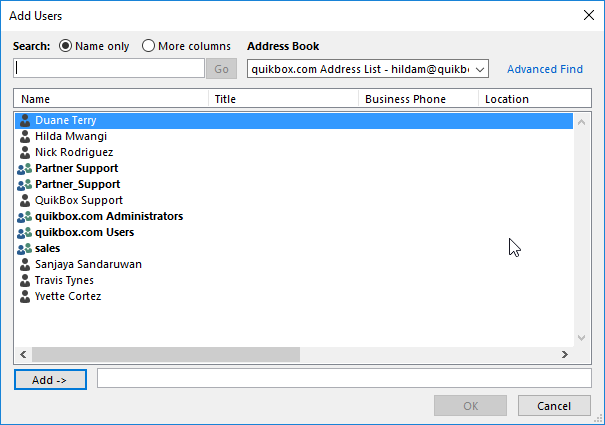](https://books.quikbox.com/uploads/images/gallery/2021-12/H0BJrhQHxyHk3tzJ-outlook4.png) 5. To remove a delegate, select the user and choose Remove. 6. Click **Apply**, then **OK**. - - - - - - ## Adding a shared calendar to your Outlook 1. Go to **My Calendars [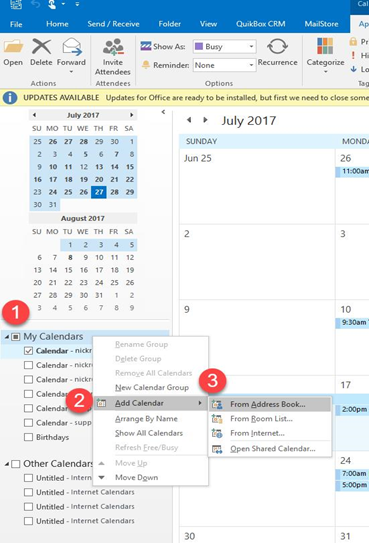](https://books.quikbox.com/uploads/images/gallery/2021-12/JcAAsCpOXb5hOznR-outlook5.png)** 2. Select **Add Calendar** 3. Select **From Address Book** 4. Select the contact whose calendar has been shared then select **OK**[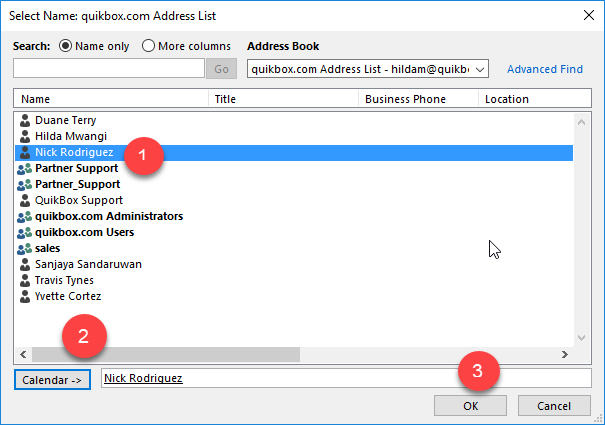](https://books.quikbox.com/uploads/images/gallery/2021-12/ScL3bJXNK5ynWGPB-outlook6.png) # Adding a new phone to your RingCentral account Adding a new phone to your RingCentral account. [](https://books.quikbox.com/uploads/images/gallery/2021-12/nymnUuC1Y067hT8R-outlook3.png) [Screenshot\_20211215-010618\_Nextcloud.png](https://books.quikbox.com/attachments/2)