Maintenance
Removing Managed Version of WebRoot
Some MSPs used the managed version of WebRoot on client computers. Uninstalling it can be a hassle as it is meant to be.
Go to C:\ProgramData\WRDATA and delete the folder.
You will need to show hidden files.
Now uninstall from Add/Remove Programs
or
Run a command line instance as Administrator.
"C:\Program Files\Webroot\WRSA.exe" –uninstall
New Page
As organizations invest more heavily in their IT infrastructure, managed services providers (MSPs) and administrators should consider how they can keep digital environments secure and organized. By taking the time to reduce organizational IT complexity and align end-user behavior with business goals, network professionals can do their part to provide a unified IT experience, support overall objectives, and—most importantly—prevent potentially crippling data breaches.
RELATED PRODUCT
RMM
Support, manage, and protect with an RMM solution that scales as you grow.
For MSP customers across a wide range of industries, the importance of taking these steps has never been more pronounced or more immediate. In fact, a report from Juniper Research found that cybercrime will cost businesses more than $2 trillion in 2019. While many of these costs will come from external bad actors carrying out brute force attacks on organizations and infecting networks with malware, some breaches come from within. In fact, Verizon’s 2019 Data Breach Investigations report concludes that insiders caused 34% of all data breaches carried out in 2018—although many were inadvertent.
New Page
While trying to open a PDF file you are receiving an error stating “The file is damaged and could not be repaired.”
Why might you be facing this error?
There are several reasons why you might be facing this error:
- Corruption may happen if the PDF file is downloaded improperly, due to sudden shutdown, unstable internet connection or a bulky file
- Due to a virus and malware attacks
- Security settings in Adobe Acrobat
- Broken or outdated PDF Reader
- Interruption while transferring (copying) the file
- Temporary files and cache
- Complications in the programs or its abrupt termination
- Corruption in PDF file
How to fix the error “The file is damaged and could not be repaired”
As there are many reasons that lead to this error, there are many solutions as well. Below we are going to mention the most successful solutions to fix the error.
- Download/Transfer Again
If you downloaded or transferred the video from some external source, then it is advisable to do it again. Sometimes, while downloading a file, there are chances of it ending up with a broken or incomplete file. Hence, if you still have the access to the source or origin of the file, it is recommended to download or transfer the file again. - Clear Temporary Files
If you haven’t cleared your temporary internet files recently, then now it is the time to do so. Sometimes, temporary files are the ones that create this problem, and it is necessary to delete them. For this, just press Win + R key and type inetcpl.cpl and in the Internet properties dialogue box just Delete the browsing history. - Change Adobe’s Security Settings
Too tight security measures in Adobe Acrobat can also cause this error. In this case, you might need to change the security settings and this will help opening the file. For this, follow the below-mentioned steps:
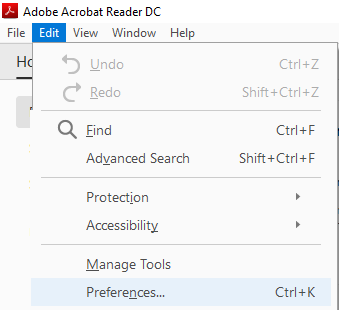
- Run Adobe PDF Acrobat and click on the Edit menu in the toolbar.

- In the Edit menu, select Preferences
- Now, under Enhanced Security clear the Enable Enhanced Security option. Before moving forward make sure that the Protected View is checked Off.
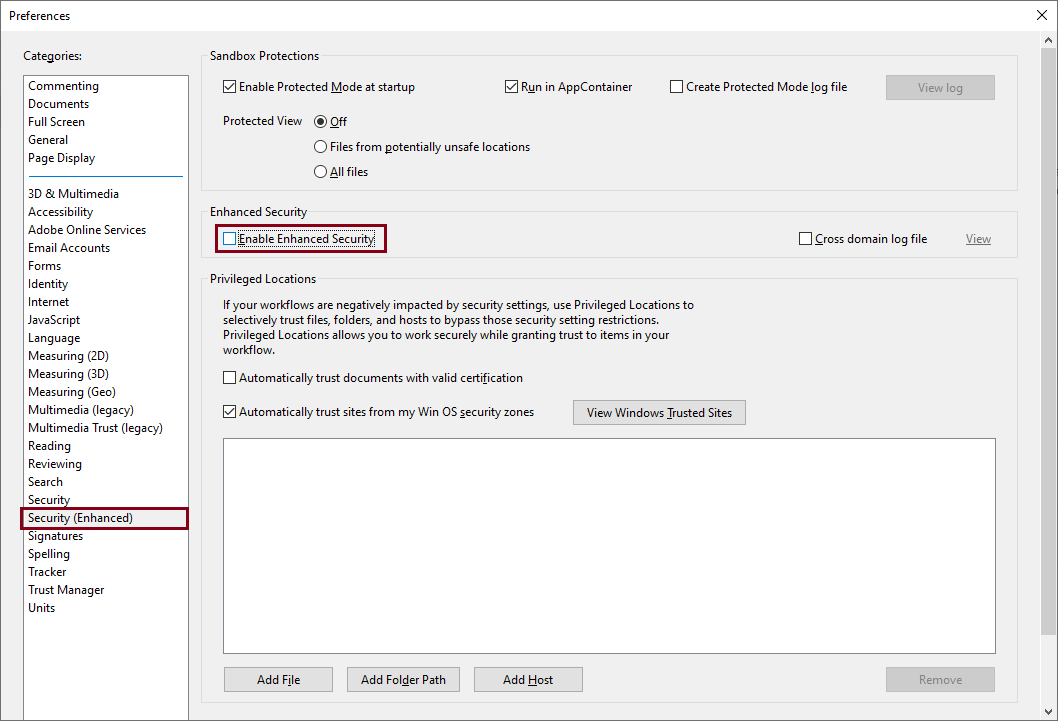
- Finally, click on OK to finish the process.
Once you follow all the above-mentioned steps successfully, you now should be able to open the file without any issue.
Let’s learn A simple way to repair Adobe PDF files step by step:
- Start with downloading the tool from its website; then install it properly into your system and run.
- Now the home screen of the tool will be in front of you; there, click on the Select File(s) option and add files from its location on your system.
Note: You can add as many files as you wish, and if you want to remove any, you can use the Remove File(s) option to do so.
- Now, click on the Repair option to start with the repair process.
- Once all the steps performed properly, the tool will start repairing the files one by one. The tool will display the report of repair process live on the screen as shown in the snippet.
Stop: Click on the Stop button anytime to stop the whole process.
So, this is how one can repair a PDF file with Kernel for PDF Repair. You can also learn to Open PDF Documents in Microsoft Edge easily.
Blink Codes and Beep Codes for Intel® NUC
The power LED on the Intel® NUC blinks in a pattern if an error occurs during POST. Intel NUCs that include a front panel audio jack produce a beep pattern that you can hear through headphones, or speakers plugged into the jack.
Patterns and solutions
| Sequence/pattern | Meaning | Troubleshooting steps |
|
3 blinks (3 beeps) On-off (1.0 second each) three times, then 2.5-second pause (off). The pattern repeats until the computer is powered off. |
Memory error |
Make sure you are using the correct voltage memory for your Intel® NUC. Other tips:
If the Intel NUC has two memory slots:
It's rare that this blink pattern would appear on an Intel NUC that has the memory modules soldered down on the board. If it does, it likely means the soldered down memory has failed. In this case, contact Intel Customer support using the link below. |
|
Continual blinks Off when the update starts, then on for 0.5 seconds, then off for 0.5 seconds. The pattern repeats until the BIOS update is complete. |
BIOS update in progress | This pattern is normal behavior. No action is necessary. |
| 2 red blinks Repeating pattern: on 2.0 seconds, then off 2.0 seconds. |
Computer is in Sleep mode (S3 state). This is normal operation. | This blink pattern can be turned off in BIOS:
|
| 1 blink every 5 seconds | Power-on circuit may have failed |
Contact Intel Customer Support for assistance. |
|
16 on/off blinks (8 beeps) 0.25 seconds on, 0.25 seconds off, 0.25 seconds on, 0.25 seconds off, for a total of 16 blinks. Then the computer shuts down. |
CPU thermal trip warning |
Check that chassis ventilation holes are not blocked and unit has sufficient airflow. |